
In this post, I am going to show you how to set up and configure a Hadoop Single Node Cluster installation so that you can quickly perform simple operations using Hadoop MapReduce and the Hadoop Distributed File System (HDFS).
To launch an instance on AWS follow the AWS documentation
While creating an instance make sure you choose Ubuntu Server distribution as we are working on Ubuntu.
After creating an instance login to the server through ssh.
Follow the below steps to set up Hadoop Single Node Cluster on your Linux/Ubuntu server.
1. Update the packages on the server
$ sudo apt-get update
2. Create an ssh key so that we can log in to our localhost with that key.
$ ssh-keygen
3. We need to append the newly generated ssh key to authorized_keys file in .ssh directory.
$ cat ~/.ssh/id_rsa.pub >> ~/.ssh/authorized_keys
4. After adding the keys check if you are able to ssh to localhost.
$ ssh localhost
5. As hadoop runs on Java Runtime Environment (jre) we need to install openjdk packages. You can also use openjdk-11-jdk but for now we use version 8.
$ sudo apt-get install openjdk-8-jdk -y
6. Download the Hadoop file from Apache Hadoop archives. We are going to use hadoop-1.2.1 here. You can directly run the below command to download it in your Ubuntu server.
$ wget https://archive.apache.org/dist/hadoop/common/hadoop-1.2.1/hadoop-1.2.1.tar.gz
7. Extract the downloaded file.
$ tar -xzvf hadoop-1.2.1.tar.gz
8. Move the hadoop-1.2.1 directory to /usr/local and also rename the directory from hadoop-1.2.1 to hadoop. Use the mv command below to perform both the step in one go.
$ sudo mv hadoop-1.2.1 /usr/local/hadoop
9. Now we will start with the configuration for hadoop. Edit the .bashrc file.
$ nano ~/.bashrc
10. Scroll down at the bottom area & paste the commands. Make sure you don’t edit anything else in bashrc.
export HADOOP_PREFIX=/usr/local/hadoop/
export PATH=$PATH:$HADOOP_PREFIX/bin
export JAVA_HOME=/usr/lib/jvm/java-8-openjdk-amd64
export PATH=$PATH:$JAVA_HOME
ctrl + O (to save) > Enter > ctrl + X (to exit)
11. Edit the hadoop-env.sh file in /usr/local/hadoop/conf/
$ nano /usr/local/hadoop/conf/hadoop-env.sh
12. Paste the commands in the mentioned area as per the below image.
export JAVA_HOME=/usr/lib/jvm/java-8-openjdk-amd64
export HADOOP_OPTS=-Djava.net.preferIPV4Stack=true
ctrl + O (to save) > Enter > ctrl + X (to exit)
13. Edit core-site.xml.
$ nano /usr/local/hadoop/conf/core-site.xml
14. Paste the following commands in-between the <configuration>&</configuration> (If you create your own DNS, you need to rename the localhost to your hostname e.g myhostname.local).
<property>
<name>fs.default.name</name>
<value>hdfs://localhost:9000</value>
</property>
<property>
<name>hadoop.tmp.dir</name>
<value>/usr/local/hadoop/tmp</value>
</property>

ctrl + O (to save) > Enter > ctrl + X (to exit)
15. Edit hdfs-site.xml
$ nano /usr/local/hadoop/conf/hdfs-site.xml
16. Paste the following commands in-between the <configuration>&</configuration>
<property>
<name>dfs.replication</name>
<value>1</value>
</property>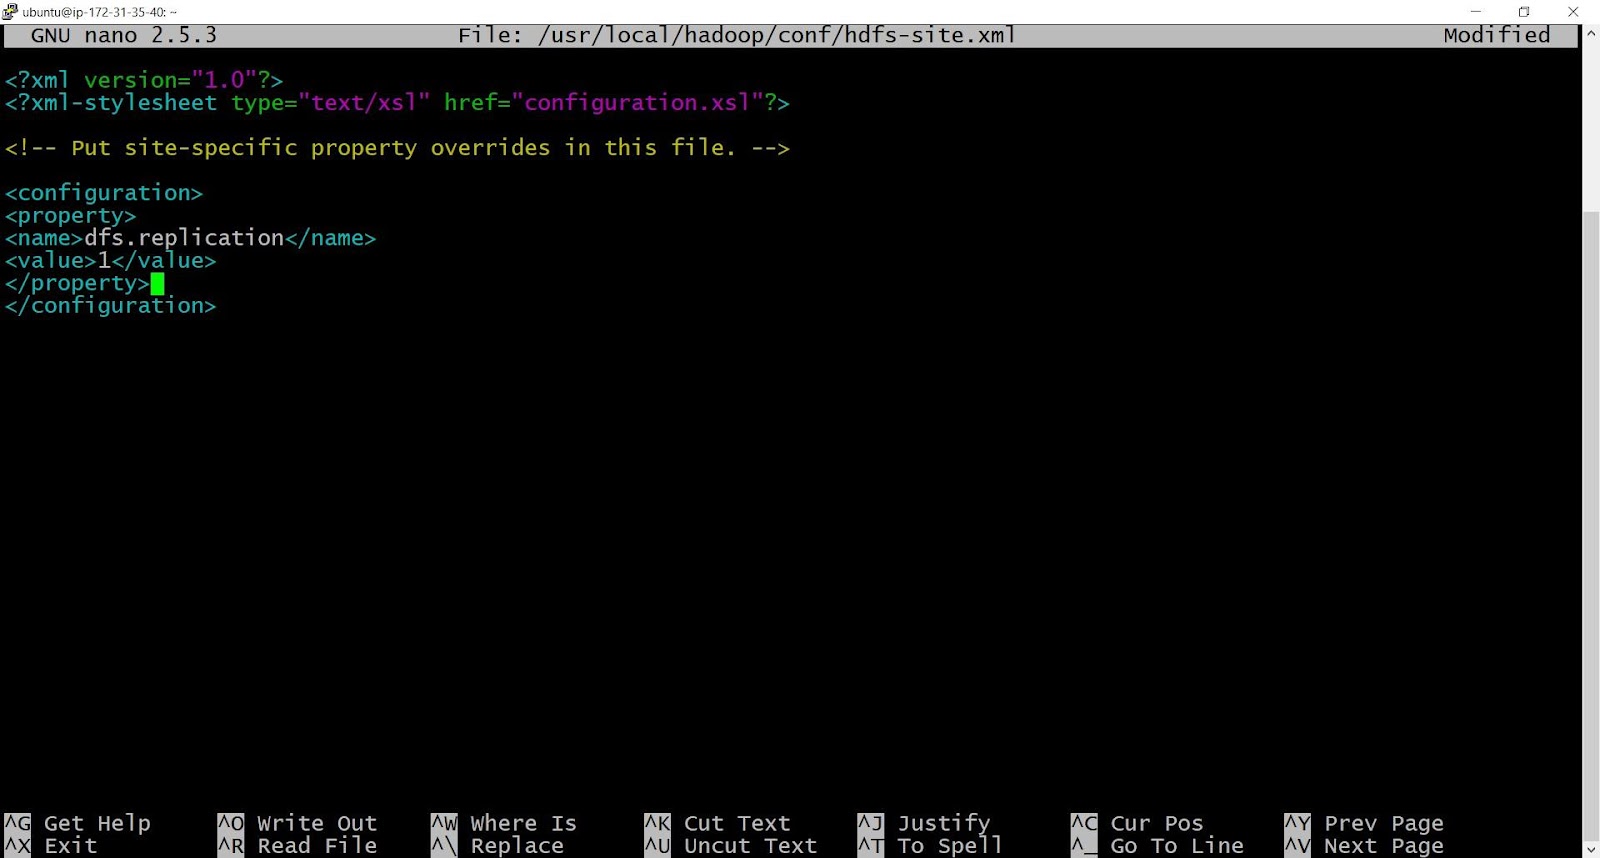
ctrl + O (to save) > Enter > ctrl + X (to exit)
17. Now edit mapred-site.xml
$ nano /usr/local/hadoop/conf/mapred-site.xml
18. Paste the following commands in-between the <configuration>&</configuration> (If you create your own DNS, you need to rename the localhost to your hostname e.g myhostname.local).
<property>
<name>mapred.job.tracker</name>
<value>hdfs://localhost:9001</value>
</property>
ctrl + O (to save) > Enter > ctrl + X (to exit)
19. Create a tmp directory.
$ mkdir /usr/local/hadoop/tmp
20. Refresh bash
$ exec bash

or

$ bash
21. The following instructions are to run a MapReduce job locally. So first we will Format the filesystem:
$ hadoop namenode -format
22. Start NameNode daemon and DataNode daemon:
$ start-dfs.sh
23. Start MapReduce.
$ start-mapred.sh
24. To check the processes running:
$ jps
25. Open the security group in which you have deployed you AWS EC2 VM. Click on you VM > Security > click on security Groups link.

26. Click on edit inbound rules.

27. Here we will add 4 security rules. Click on Add rule for 4 times

28. Configure the port range to 50070, 50030, 50075, 50010 & change there source to My Ip and click on save rules

29. Now you have successfully modified on the security groups

30. To review, open Incognito mode and launch
yourpublicIPv4address:50070

31. Also, open yourpublicIPv4address:50030

Great, you have successfully deployed Hadoop Single node cluster on you AWS EC2 instance!!!
For any questions comment down below. Also check our other post.